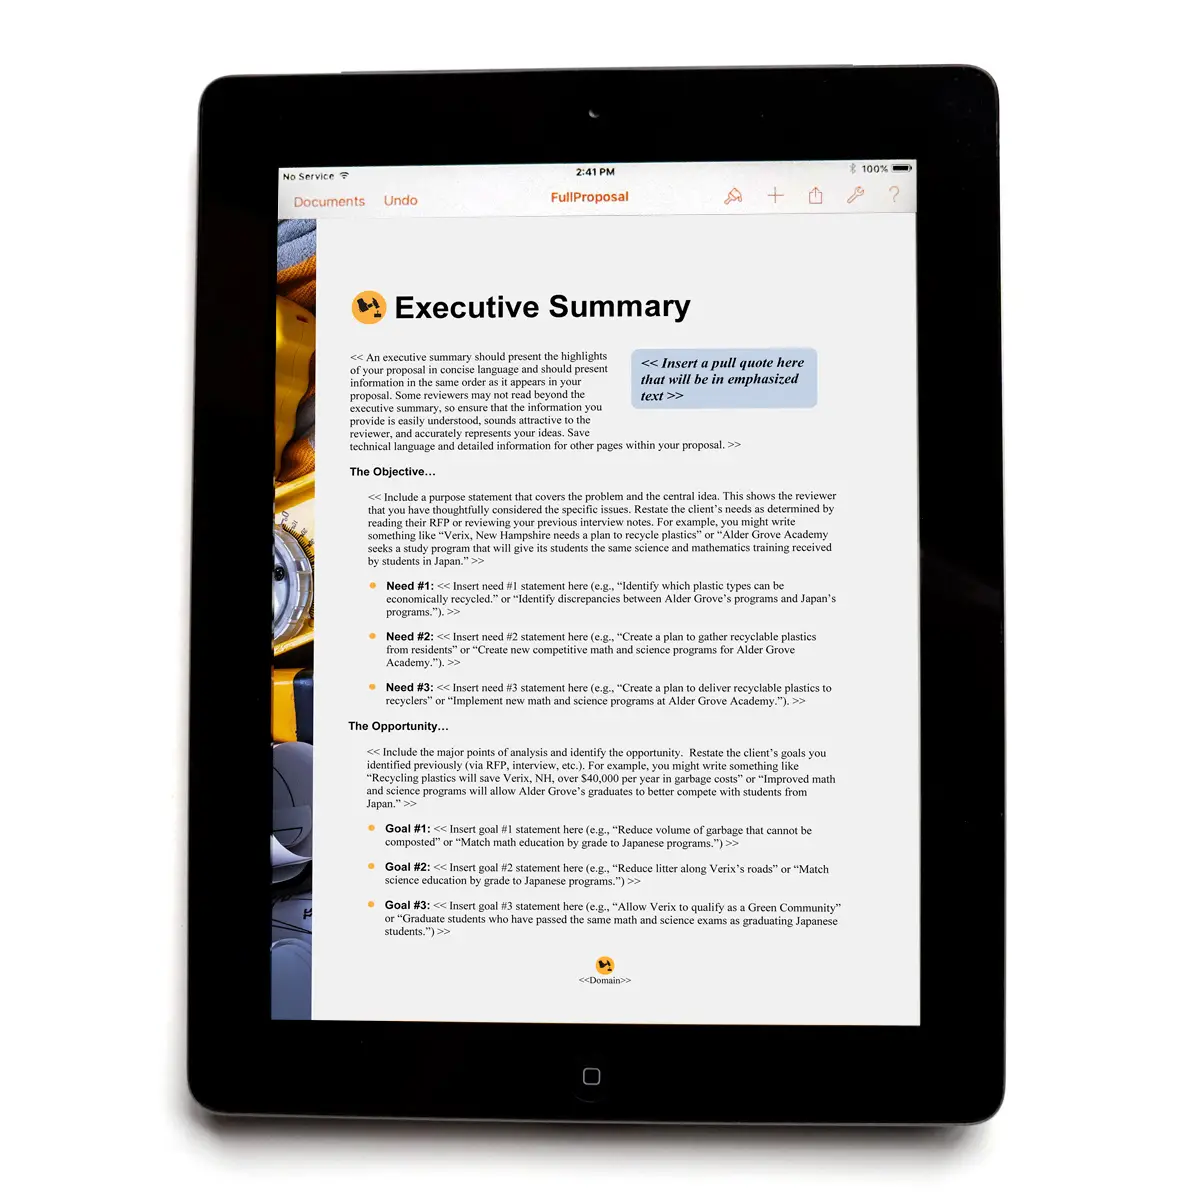
This article will show you how to use your iPad with Proposal Kit products to efficiently create your job estimates and write your client proposals and immediately deliver them as PDF documents while out in the field.
As a free bonus, we are including copies of the customized spreadsheets and editable proposal documents created for this article with the purchase of Proposal Pack or Proposal Kit Professional.
Often the key to closing the deal and landing a new client is the ability to immediately finalize all the details while the lead is hot and there is no time to waste.
1) Get Proposal Kit / Proposal Pack on your PC or Mac
The iPad does not stand alone in your proposal and estimate writing system. You still need an office computer where you will perform your heavy editing and store your proposal archives.
First, you want to get your Proposal Pack or Proposal Kit Professional documents installed on your office Windows or Mac computer. This step is as simple as placing an order for one of the products, then downloading and installing it on your computer.
Now you have all of your starting documents on your office computer, ready to assemble, edit and prepare for your iPad.
You might ask, "Why don't you just have an iPad proposal and estimate app?" There are a handful of "job estimate apps" out there, but they are not proposal writing applications. A simple job estimate with a bottom line price is not really a proposal. A business proposal includes elements such as a cover letter, sections that show your clients that you understand their problems, sections that describe your proposed solutions (your services, products, project, etc.), and include your recommendations and a call to action. There are no iPad apps that can do this, and you really do not need a dedicated app. All you need is a word processor and spreadsheet - which already exist on the iPad.
2) Assemble and edit your documents and get them ready for your iPad
Now that you have your proposal documents and estimate spreadsheets on your computer, it's time to edit them and get them ready for your iPad. While the iPad has word processing and spreadsheet capabilities, it is still a fairly basic office software platform. For the initial setup of your proposal and estimate spreadsheet, it's more efficient to do your major editing on your Windows or Mac computer. This also ensures all your original work is archived.
The number of potential types of proposals that can be written using Proposal Pack is unlimited. And there is no limitation on the types of proposals or business sectors that can benefit from this platform. For practical purposes, the people who will see the most benefit are those who need to assemble one or more master proposal templates that will be used to quickly and efficiently create multiple client proposals in the field. If you are creating a one-off complex proposal such as a government grant or detailed business plan funding proposal, you might be better off doing your work on your primary PC or Mac computer.
The first step in getting your proposal ready for the iPad is to assemble your master proposal. This is done using Proposal Packs and the optional Proposal Pack Wizard software to select and assemble a collection of templates that cover all the topics you need to discuss in your proposals. This collection will be different for everyone; this is one of the reasons the Proposal Packs include so much material. Most everyone will follow a similar high level structure, such as starting with a cover letter and title page, then, for a more personal touch, adding some topics that specifically talk about the potential client's needs and your understanding of them, and then adding some topics that describe your products or services and prices, then finishing with credentials, recommendations and a call to action. The Proposal Packs include templates for thousands of topics that will cover everything you will need to say to your prospective client.
Our examples use three different industries that are turning more and more to the iPad as it can be used in the field not only to create estimates and proposals, but also to showcase work to clients via photo slideshows and video presentations.
We include the editable versions (the 18 cutomized PC/Mac and iPad documents) of the following three samples created for this article as a free bonus in Proposal Pack and Proposal Kit Professional.
 For Event Planners (parties, corporate events, weddings, catering, etc.):
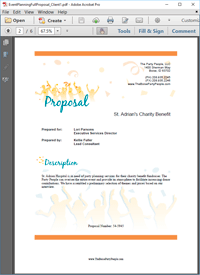
Our first example is for an event planning company using Proposal Pack Events #2. The event planner example uses a proposal assembled from these Proposal Pack templates: Cover Letter, Title Page, Services Provided, Samples, Services Cost Summary and Company History. We will also create a custom estimate spreadsheet using Proposal Pack's Services Cost Summary Calculator spreadsheet.
 For Real Estate (home sales, general contractors, painters, lawn care, etc.):
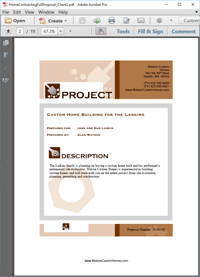
Our second example is for a general contractor using Proposal Pack Construction #3. The contractor example uses a proposal assembled from these Proposal Pack templates: Cover Letter, Title Page, Table of Contents, Cost Summary, Production Schedule, Permits and Licenses and Testimonials. We will also create a custom estimate spreadsheet using Proposal Pack's Services Cost Summary Calculator spreadsheet.
 For IT Companies (networking, software, web design, telecom, hardware, etc.):
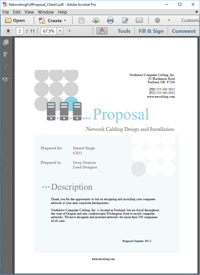
Our third example is for a networking company using Proposal Pack Networks #2. The networking example uses a proposal assembled from these Proposal Pack templates: Cover Letter, Title Page, Table of Contents, Client Summary, Estimate, Installation Schedule, Permits and Licenses, Qualifications, References and Contract and Terms. We will also create a custom estimate spreadsheet using Proposal Pack's Estimate Calculator spreadsheet.
For illustration purposes, we will use the same methods for all three industries to show that the only differences are in the actual content of the text you will write. The apps, templates, spreadsheets and techniques will work across all business sectors and business specialties.
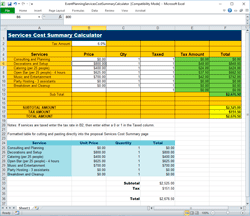 On our PC or Mac, we open our ServicesCostSummaryCalculator.xlsx spreadsheet. The stock spreadsheet is general purpose and has fill-in-the-blank cells for any business. For each example, we create a version of the services calculator with line items, prices and taxes for the various services (or products) we have available. (Note that there are many different calculator spreadsheets in Proposal Pack; this is only one of them.)
The stock estimate spreadsheet is great for creating your financial estimates and price quotes, but it's not in a visually pretty format that you would want to put as-is into your proposal. Generally speaking, in proposals you want to include only the major highlights and totals, not all the fine details of your calculations. Because the iPad spreadsheet and word processor apps are not integrated (as of the time of this writing), you need to set up the iPad versions of the spreadsheets in a way that makes it fast and efficient to paste a visually appealing version of your calculations into your proposal.
The stock spreadsheets have been modified for iPad use by creating a second version of the estimate that includes only the details in the way we want them visually formatted and displayed to the client. The calculations are still only done once and both the standard spreadsheet and the custom version for pasting into our proposals are updated simultaneously. You will see how this works when you open the actual spreadsheets for these examples. If you look at the screenshot above you can see the more visually appealing version in blue. This is the section that will be copied and pasted right into the proposal after the calculations in the top are completed.
Next, you create your master proposals that will be reused for multiple clients on the iPad. The same process is used to create master proposals on the iPad as is used to create proposals on the PC or Mac, so you get the benefit of being able to create client proposals on all your computers.
For your master proposals, you select your proposal templates (as outlined in the examples above) and fill in all the details that will stay the same (or mostly the same) across all your client proposals. Leave in tags to be replaced later with client specific information. We used our standard Proposal Pack convention of putting anything that needs to be replaced in bracketed tags << something to replace here >>. This would include client contact information, client company names, and details about each specific client's projects and needs. Some templates will have no tags and will stay the same for every proposal (such as the Company History and other templates that describe your company). Some templates will require more custom edits for each client proposal (such as the Cover Letter and Cost Summaries and Estimates). For our master proposal, we removed the table for the product/service/estimate costs. This will be replaced by pasting in the table directly from the iPad's Numbers spreadsheet app.
After you have assembled and filled out the selected templates, added your custom logos and added your tags to make it easy to locate items to be replaced on each proposal, you are ready to move your documents onto your iPad. Note that the iPad Pages word processor app can open Word files and the iPad Numbers spreadsheet app can open Excel spreadsheets, so go ahead and save them in the native format of your Windows or Mac office software. Our examples were created using Microsoft Word and Excel files saved as .DOCX and .XLSX files.
3) Install your third-party iPad office apps
For purposes of this article, we will focus on two iPad office apps that work well together.
- Pages – This app will handle the bulk of your in-the-field word processing needs.
- Numbers – This app will handle the bulk of your calculating needs for estimates.
You may also want to use a Bluetooth keyboard. An external keyboard will be more efficient for word processing than the iPad's virtual keyboard.
4) Move your proposals and spreadsheets onto your iPad
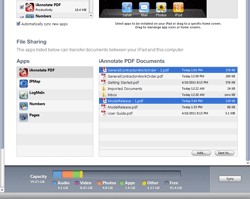 There are a number of ways to get your documents from your computer to your iPad (iTunes, iCloud, Dropbox). It's beyond the scope of this article to outline every possible option in every iPad app, and app features change over time, but we'll suggest a couple of easy methods here.
One easy way is to simply email the documents to the email address you have set up on your iPad. Then all you have to do is open the attachment and you will have access to the document in your iPad word processor or spreadsheet app.
Another easy way we've found to move documents is to use iTunes to sync files. The iTunes sync option is supported by the iPad Pages and Numbers apps, so that's the method we'll discuss here.
Plug in your iPad and open iTunes. Click your iPad device and then click the Apps window. If you have purchased and installed Pages and Numbers, you will see those apps in the File Sharing list here.
This is where you add your own .DOCX and .XLSX files from your hard drive. Click the Add button for the Pages app, browse to where you saved your edited master proposals and then add them. Do the same to add your .XLSX files to the Numbers app.
When you have added all your custom documents, you can sync your iPad. All your custom documents will now be on your iPad and accessible by your iPad apps.
If you make changes to your PC or Mac versions, you will need to repeat this process to add the new versions and sync your iPad again.
5) Final iPad editing adjustments
You may have to make some final minor modifications after importing your documents to the iPad. Because the iPad Pages word processor has limited capabilities, it is possible that not all of your document's features will import perfectly. For example, if you are using a Proposal Pack graphic skinned set of templates, the imported iPad version might lose the custom colored page border, custom-designed bullet points may be replaced with standard circle bullet points, and the accent graphic in your page footers might disappear. If you used custom fonts in your body text, they might need to be changed. Some of these things you can manually fix, such as adding back our accent graphic (which requires you to sync the graphic to your iPad Photo Album and manually re-insert it using the Pages Document Setup screen).
If the font is different than your document's default text when you start editing change the font by clicking the Pages information button, scroll down the options list to the Text Options and change the font to match. One thing you want to avoid is mismatched text fonts and font sizes in your final proposal.
After you have double-checked and fixed any formatting changes, you are ready to write your client proposals on your iPad.
6) Create client estimates and proposals on your iPad
 For a new client estimate, first open the iPad Numbers app, click the My Spreadsheets button, then click the down arrow button at the bottom of the iPad screen, and finally click the Copy from iTunes button. This will give you access to your custom spreadsheet. Now, for each new client, click the plus sign (+) icon next to the arrow and then click the Duplicate Spreadsheet button to create a copy of the spreadsheet to use for this new client (and leave your original spreadsheet untouched for future estimates).
If you click the spreadsheet title, you can rename it. It helps to assign a name specific to each new client so you can easily locate estimates for individual clients as you add more and more in the future.
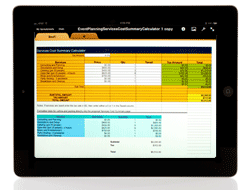
Open the spreadsheet and fill in the prices and quantities for the new estimate. You will see your more visually appealing version updated at the same time. After you have completed the estimate, you are ready to create your proposal for this client. Highlight the section of the spreadsheet designed for pasting into the proposal (the blue section of the spreadsheet shown in the photo), and then click the Copy button.
Now open your iPad Pages app. You will go through the same process here to load and open your master proposal. Click the My Documents button, then click the down arrow button at the bottom of the iPad screen, and finally click the Copy from iTunes button. This will give you access to your custom master proposal. Now for each new client, click the plus sign (+) icon next to the arrow and then click the Duplicate Document button to create a copy of the master proposal to use for this new client (and leave your original master proposal untouched for future proposals).
One reason for reusing a master proposal template like this (and not copying a completed proposal that was written for a different client) is that it helps ensure you do not make the all-too-common mistake of sending a proposal to a new client that includes details from another client because you forgot to double-check your work and remove all of the other client's information.
Click the document title and rename it, using a name specific to this new client so you can easily locate proposals for individual clients as you add more and more in the future.
Open the new document and fill in the tags with the details for this client (such as the client's contact information, company name, project details, needs you identified, and so on). If you look at the examples we created for this article, you will see how we wrote a custom cover letter for each type of business, but left in tags that will allow us to quickly and efficiently customize the master proposal for each new client. To the clients, it appears that we wrote each proposal just for them.
The iPad Pages app lets you search for text, making it very easy to locate all of the tags that need to be replaced if you remember to use our << something to replace here >> tag naming convention. All you have to do is search for "<<" and you will locate all the tags you need to replace. You can also search and replace if you use repeating tags throughout the master proposal template.
The last thing you need to do is drop in your custom estimate. Because the iPad Pages and Numbers apps are not integrated together, you do not want to have to manually copy and paste individual line items and cells from your estimates into your more visually appealing proposal. This would be very inefficient and prone to errors.
Now go to the Services Cost Summary or Estimate page of the master proposal and put your cursor above the disclaimer (this is where we previously removed the estimate table when we created the master proposal). Click the page to bring up the Paste button and paste in the section of the spreadsheet copied from the Numbers app. You will now see the entire nicely formatted spreadsheet copied right into your proposal in one click.
Take a final pass through the completed client proposal to ensure there are no spelling errors, all tags have been filled in, and there are no grammatical or other mistakes.
Now your final client proposal complete with custom estimate is ready to deliver. Using the iPad, you can click the My Documents button, then click the Send button and then email a copy to the client as a PDF document. If you have a Bluetooth printer, you could even print a copy right on the spot.
When you return to the office, you can sync your iPad and then copy all your new client proposals and spreadsheets to your computer.
Click here for an example of a completed and delivered Event Planner Proposal created using Proposal Pack Events #2, Numbers and Pages on the iPad.
This is just one of hundreds of Proposal Packs that can be used on your iPad.
All of the editable files used in this article to create this client proposal and estimate on the iPad are included free with the purchase of Proposal Pack.
Click here for an example of a completed and delivered Contracting Proposal created using Proposal Pack Construction #3, Numbers and Pages on the iPad.
This is just one of hundreds of Proposal Packs that can be used on your iPad.
All of the editable files used in this article to create this client proposal and estimate on the iPad are included free with the purchase of Proposal Pack.
Click here for an example of a completed and delivered Networking Proposal created using Proposal Pack Networks #2, Numbers and Pages on the iPad.
This is just one of hundreds of Proposal Packs that can be used on your iPad.
All of the editable files used in this article to create this client proposal and estimate on the iPad are included free with the purchase of Proposal Pack.
7) Move your proposals and estimates securely back to your PC or Mac
At the end of the day, you still need to move your client proposals and estimates from your iPad and save them back on your office computer. This is a basic safety precaution. If you ever lost your iPad, you want to make sure you can retrieve all your past work.
If you ever needed to have someone back at your office help finish a proposal due to time constraints or resources you lack in the field, you can email the editable version back to your office for completion, then have the finished proposal emailed back to your iPad for final proofing, edits and delivery.
There are many options for designing a proposal and estimate writing and delivery system for your business. This article outlines just one possible solution that can be modified in many different ways.
You can see how the iPad can be a very effective proposal and estimate writing tool for professionals in the field. By combining a few low-cost iPad apps with a Proposal Kit proposal template collection, you can create a cost-effective mobile proposal management solution for your business.
These Proposal Kit products include contracts ready to use on your iPad:
Read our other article on how to use your iPad to sign and manage your legal contracts.


 Cart
Cart


 Facebook
 YouTube
 X
X Search Site